Monday, March 24, 2014

Day 71 - Bump work

I've place another order for more chrome wheel trim for the dome like I used last time, as I was only left with enough to make the dome's one full-bisecting line, and nothing more.  I've also got some repair to do to the mold, where some of the gray gel-coat is pretty solidly stuck to it.  I'll need to take out the inserts that were left behind, and give everything a good sanding, cleaning, and polishing.

Today was not that day.

Nothing much to report today, though it was a full day, regardless.  I finished off cutting 56 3.5" disks for my hemispheres using the hole cutter, added the extra ventilation hole for glue curing, and then put bolts, washers, and nuts into 50 of them, torquing them tight.  I accidentally only bought two packs of 25 bolts each, thinking I was buying two packs of 50.  So oops, I ran out!

I also glued 16 of them, enough for the front four skirt panels.  I wore a latex glove to finger-smear around the edge to work the glue (Liquid Nails) in.  Once they're all cured, I'll attach them.  I'm waiting on painting everything because of the limited space in my garage, and I don't want to scrape or bump into paint while I'm working.  I'll trim the extra bits of plastic off of them later.

I also went to a place about 30 minutes south of me called Metal Supermarket and wandered around their floor, eventually selecting three aluminum tubes for my plunger arm: 1.5", 1.25", and 1", respectively.  These had a wall thickness of a 1/16" of an inch so that each tube can fit inside the next.  I'm going to need to figure out some way of making top hat bushings (perhaps from PVC) so that they sit snugly inside one another, and not rattle around loosely.

Thursday, March 20, 2014

Day 70 - The dome revealed!

So.  I got home at about 17:00 and pretty much headed straight for the garage.  I had placed my space heater in there before going to bed last night to keep it nice and warm, in an effort to assist the curing as much as I could.

Using the yellow plastic filler spreaders, I hammered in my entire supply all around the circumference of the mold.  I kept this up, sometimes doubling up on the wedges, until I started to hear some encouraging crackling noises.  After about half an hour, there was one final *crack*, and the dome had come loose.  That silicone release agent worked like a charm!  No PVA at all, just a few coats of that silicone.

I set to work removing the trim and the rubber inserts.  I could already tell that there was damage due to the air pockets.  It's something that I'm pretty sure I can repair with some Bondo filler.


Some pictures of the damage, blemishes, and groove "ripples":


And shots of all four sides of the dome:


After I trimmed off the fur with my Dremel tool, I snapped the latest stack shot:


I'll very likely make another dome.  If I do, I need to repair the mold a little, and I'm going to apply these lessons going forward:
  • Use a bit more catalyst in the gel-coat, at least another 10-20 drops' worth for 8 ounces, stirring quite thoroughly, scraping the sides of the cup with the mixing stick
  • Allow the gel-coat to get a decent amount of tack before applying glass tape
  • Use either thinner tape for the reinforcement of the grooves, or apply tape on either side of them (and the inserts) first to build up the glass, then cover with another strip of glass tape
  • Use thinner chop mat initially, and build up from there
All in all, however, I'm pretty pleased with how it turned out.  I have a dome now!

Day 69 - The dome!


My 1/4" wheel trim arrived in the mail, so that was the final thing needed before I set out to lay up the dome!  I eagerly started to apply it to the mold.  I carefully measured out the amount that I needed, and used that length's center-point to show how far off (or not) I was in my initial measurements.  As you can see in the photo, I was pretty darn close.  I marked an adjusting line for laying out the other pieces of trim.

After finishing up with the trimming, I placed my rubber intent cut-outs onto some newspaper, and sprayed the back of them with some 3M light spray adhesive.  I allowed that so sit for a minute to get some tack to it, and then pressed those onto the mold, as well.


I didn't want to nudge any of this detailed work by sponging on the release wax, so instead, I sprayed on a different type of mold release, based on silicone.  Its pseudo-oily slickness would hopefully provide a sufficient barrier between the mold and the eventual gel-coat and glass layers.  I sprayed on a couple of coats of this, redistributing it with a foam brush when finding any pools (which were few).


I mixed up some gel-coat, this time tinted gray, and started to pour and brush it onto the surface.  And man, I discovered just how slick that silicone release agent is—the gel-coat was slipping off of it like mud on a freshly-waxed car.  I had to really micromanage the application of the gel-coat, brushing and rebrushing it into place as it started to get some tack.  I would check up on it repeatedly after that just to make sure it was all still sticking to the mold surface.  After awhile, I noticed that the bubbly reaction I had while making the mold was also happening along the groove lines.  If the same blemishes appear within the grooves on the finished dome, I'll have to go back with some filler and fix them.  Not too worried.

I might have been rushing things a bit, or I might not have used sufficient catalyst, so only portions of the gel-coat got sufficient tack.  I went on ahead and applied some glass tape that I cut in half to the groove lines and indents.  I noticed right away that they weren't adhering very well to the half-round shape of the groove lines.  I did as best I could, and figured I would poke some resin in there once I started laying up the glass.

After letting the tape sit on the grooves for another little while (just to get the gel-coat to become tackier), I started to resin the first layer of glass.  I am using some especially thick chop mat, and I think I should have gotten some that was thinner.  I had a really hard time making sure that all the nooks and crannies of the detailing had glass sitting snugly on it.  There were air bubbles everywhere.  My roller brush that I use to squeeze out air pockets proved mostly useless on this concave surface, so I used the foam brush instead.  Went through three of those, because after awhile, the foam would fall off of the handle, and I would have to fish it out of the dome mold and into the trash.  Ugh, I hate fiberglass.


I started this process at about 20:00.  At 1:45 in the morning, I finished up, called it good, washed my hands of it (figuratively and literally), and crashed into bed.  In the morning, I check up on my work, looking closely at the grooves.  Looks like, at least near the base (which will be trimmed off anyway), there's definitely separation between the glass and the groove indent.  Ah, well.  Like I said, fixable with Bondo.

We will see what the dome looks like once I pop it off tonight!

Monday, March 17, 2014

Day 68 - Dome mold work

On Sunday, I decided to clean up the dome mold and sand down a few of the rough spots.  After thoroughly washing off the release wax and drying it off, I wet-sanded with 320, 400, 600, and 1000-grit paper.  The original luster is now slightly muted, but that won't matter.  I wanted to get to drawing in the lines and other details of the mold on a clean surface.

Part of that detailing were the four dome inserts.  I found some rubber sheets in plumbing section of Lowe's, which measured 2mm thick, and bought them on the spot, along with some spray adhesive. Following the plans, I had those parts drawn and cut out in short order.

Among my other purchases, I got some washers, bolts, wingnuts, and hex nuts.  I also got some paint: Valspar Brilliant Gold (465-66009) and Rust-oleum Universal Aged Copper.  I wanted to make a prototype hemi and decide if the gold was what I wanted to go for.

I also got to try my 3.5" hole saw for the first time.  I made several disks out of left-over HDF board, taking a note from ccain to drill an extra hole to ensure a flow of oxygen when gluing these into the hemis.  I slipped a washer over a 2" 10-24 crown bolt, and inserted it through the disk.  I fastened it down with another washer and a hex nut, then glued all along the edge of the disk with Liquid Nails.

To make sure that everything was perfectly perpendicular, I drilled a hole into some scrap MDF, which the bolt fit through perfectly, and secured it with a wingnut (which is what I'll be using to secure the hemis into the skirt section once I get that far).

While that was going on, I decided to use a separate hemi to experiment with the paint.  Laying down some newspaper and opening up the garage door, I sprayed on a couple of coats of primer, letting each dry for about 20 minutes or so.  Then, I did about three coats of the gold paint.  I must say, it's pretty pleasing to the eye.

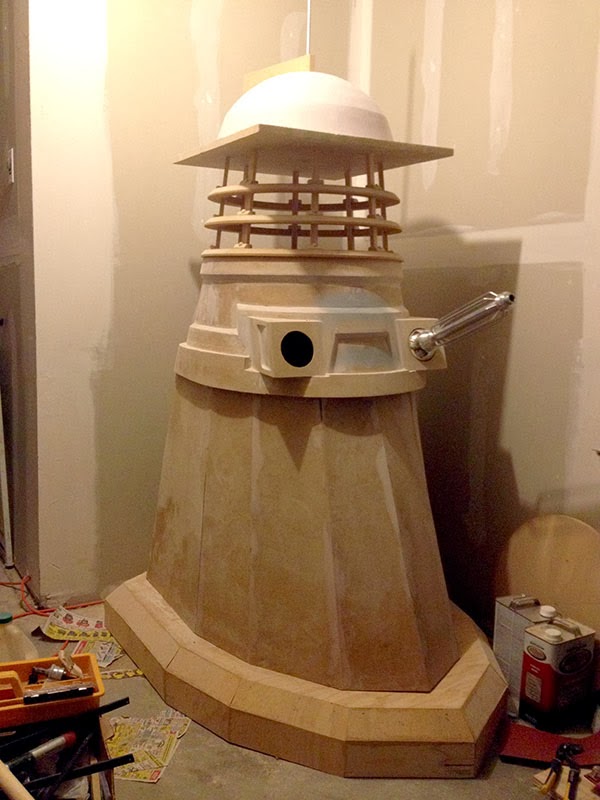
While the paint was drying, I cut out the rest of the dome inserts, and when those were done (and I had taken a slight gaming break), the paint was also finally dry.  I placed the gold hemi into an oil seal, and voilĂ !

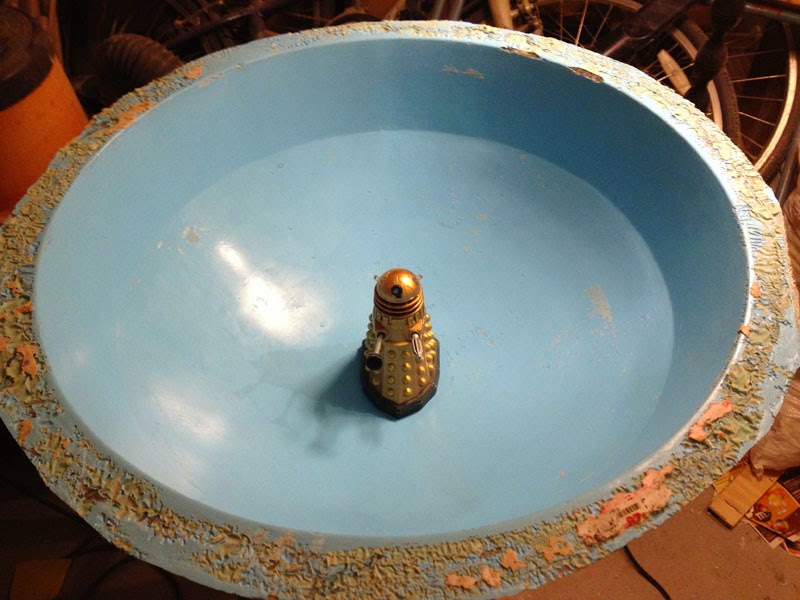
Now that I had the inserts, the next step was to draw all the lines onto the concave surface of the mold.  And man, I spent a long time with this step.  I don't know if there's a fast and easy trick to drawing straight lines on a curve.  I mostly had to eyeball it.  So first, I ran across the circular cut-out section of my largest neck ring, and placed it within the mold.  It conveniently had pencil lines dividing it into eighths, pointing—in its case—to where the neck struts were to have been cut out.

This was a great starting point.  After using a ruler to make sure that the cut-out was equidistant from the chamfer line of the mold on all sides, I started making marks in wet-erase marker.

Then, I cut a very thin strip of thick card stock and put it down on the meridian of the mold, leaving about 3 inches or so sticking up past the mold lip.  I took my protractor to make sure that the card strip was 90° (perpendicular) to the mold base, then taped it into place.  Then, I repeated that on the other side.

Next came the eyeballing part.  Using every ounce of scrutiny I could muster, I tried to ensure that the part of the card strip that was following the curve of the dome was in a completely straight line.  I then traced along one side with my marker.  I then repeated that three more times for the remaining lines.  From the center-point, I make marks on each line where the circumference of the D-shaped half-circle groove would go.  I happened to have a plate that was pretty close to that size, so I traced around it.


After that, I held the inserts into position and gently traced around them so that I knew where to place them once I sprayed on the adhesive.  I'll do that later, once the 6mm chrome half-round wheel trim arrives.

For all intents and purposes, it came out surprisingly accurate.  Looking at it doesn't trigger anything "off" to my eyes, anyway.  One thing I did have a bit of trouble with was deciding where to put the front groove lines.  According to the plans, there's a 12cm groove line starting at an unspecified angle from the eye stalk hole, connected to a 5cm groove line on another unspecified angle, which then connects to a groove perpendicular to the dome mold chamfer.  Assuming we call the chamfer groove's angle 90°, I drew the 5cm 65° from it.  Then I just eyeballed the remaining line until it equaled 12cm and touched the eye stalk hole.  Repeat for the other side.

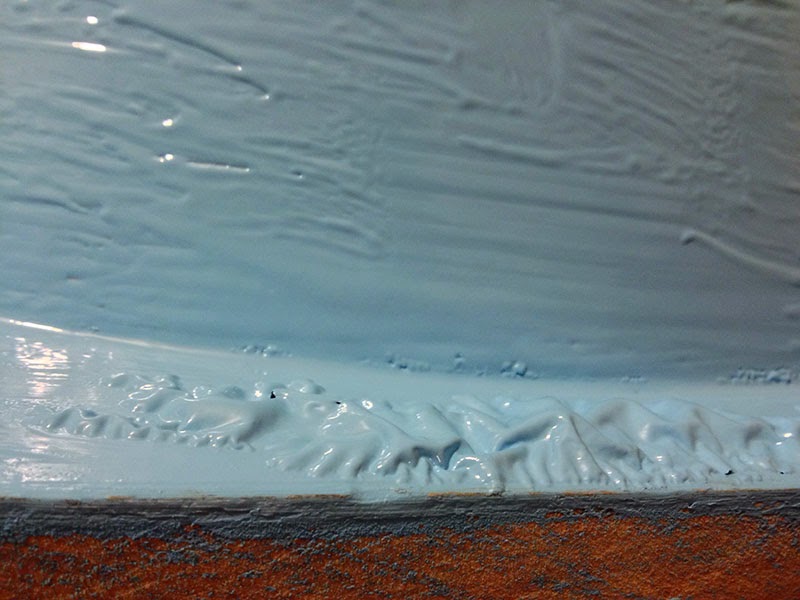
Also, before I decided to buy the wheel trim for the grooves, I experimented with applying beads of flexible caulk onto wax paper.  I found that one of my microwave plate covers was pretty close to the circumference I needed for the D-shaped groove, so I applied a bead of caulk around it.  Then, I gently pulled the cover away, and put another piece of wax paper on top to smooth out the jerky line.

I also had the idea to drill half a hole into one of my filler spreaders.  I tried to make a uniform half-circle along the bead, but I wound up squishing the whole mess into itself.  My inner perfectionist kicked in, wadded up all the work, and threw it into the bin.  Then I plunked money down on the chrome trimming.

Anyway, once that wheel trim comes in, I'll start laying it all out, putting in the inserts, and getting ready for casting the DOME!

Friday, March 14, 2014

Day 66 and 67 - The dome mold

After writing the last diary entry, I applied five more coats of the varnish for a total of six, each coat taking about 4 or so hours to dry.  I also swung by the fiberglass store and bought some blue and grey pigments as well as release wax.

When the final coat of varnish had dried, I applied the first coat of release wax with a standard household sponge.  I misread the instructions which said to basically buff it off after a few minutes, when the wax got a bit dull.  Instead, I went out and came back to the house several hours later, to see milky streaks all over the dome plug.  I wiped all that off with a microfiber cloth and applied a second coating, this time buffing it soon after.

After about six coats of release wax, I then mixed up 8 ounces of gel-coat with some of the blue dye stirred in, and painted that on the dome.  A few of the bristles of the brush got onto the plug as well, so I tried to fish those out when I saw them.  I only wound up using half of what I mixed up, which is great since gel-coat is expensive.  Afterward, I cleaned up some missing spots with a foam brush, which I probably should have used from the start.

After a few minutes, I noticed a weird reaction happening around the base of the plug, and along the board.  When I was using the former to drag Bondo across the dome, some of the filler seeped to the bottom, coating the base.  When I sanded the dome down, I didn't really bother with sanding anything but the dome.  I did varnish and wax that part as much as the smooth dome, but I think that the nooks and crannies of the un-sanded base may have had thin spots—or excess wax—that reacted to the gel-coat and made it bubble.  I also saw a smaller reaction in various places along the top of the dome.

I then let the gel-coat sit for about two or three hours.

Another mistake I made was applying the shredded chop mat to the gel-coat directly, without slathering resin down first.  I did this because I wasn't sure I had ripped up enough matting to cover the whole dome.  I say it was a mistake because I pretty much immediately realized I had mixed far too little resin to cover the whole thing in one fell swoop.  Also, the action of dabbing on resin with the brush was pushing the matting down, until when I finally got to the bottom of the plug, I had all this excess wet glass overlapping itself, or drooping over the edge of the base board.

I averted the crisis by quickly mixing enough additional resin to plaster everything else down.  After the first layer was done, I had more of an idea of how much chop mat I needed for each additional layer, so I started on layer two.  Then I did a third.  Then I went to bed.

I checked on it in the morning before going to work and saw that it was already pretty cured.  At work I was chomping on the bit to get home and check to see if I could separate the plug from the mold.  I got home, checked the dome, determined that it was ready for prying loose.  I worked for about an hour trying to separate the mold from the plug.  I boiled some water and poured that into an open section I had made.  I took plastic filler spreaders and hammered those into slightly open areas.  Eventually, the plug fell off the board.  So much for re-using it!  I subsequently chopped up and scooped out the styrofoam so that only the newspaper, surfacing mat, and Bondo was left.

I eventually got a filler knife into a crack between the Bondo and the mold!  I heard some encouraging crackling noises ... it was starting to separate! I hammered in more filler spreaders along the edge as more and more spaces started to open up.

Finally—crack!  The mold was free from the plug!  And the plug came out in one whole piece, too!  It wasn't a perfect dome, but I wasn't too bothered.  I think it can be repaired.  But now I know what the reaction I saw earlier did.  I'll read up on how to repair gel-coat and see what can be done.  Overall, I am extremely happy!


Here's the latest stack shot, with a bit of a cheat; the dome is actually the plug!  ;)


Tuesday, March 11, 2014

Day 65 - Varnishing the dome plug

To address the scuffs and pockmarks on the dome (as detailed in my previous diary entry), I opened the tube of Bondo spot putty that I bought a while back, mixed a coin-sized squirt with a dab of the cream hardener, and applied it to all the obvious, visible blemishes.  The spot putty begins to harden very quickly (about 3 minutes from my estimate), so I made several small batches.  I love how this stuff goes on—very thin and evenly (before hardening, obviously).  If Bondo is akin to mud, this stuff is like toothpaste; it fills in every little pinhole.

I also unscrewed the center rod and did a quick Bondo job to seal up the hole after stuffing some left-over shoulder foam (remember that?) into it.  After about 30 minutes or so, I took 220-grit sandpaper to gently abrade the dried putty (80-grit for the newly-sealed hole), then my finer-grit sanding sponges.  I vacuumed up the dust, then wiped it down with a wet cloth to get rid of the rest.

While it was damp, I took some 1000-grit paper to it and polished it the rest of the way.  After a final wipe-up, the remaining smaller blemishes became apparent.  I took a marker out and circled each one to keep track of it for the next application of spot putty.  I covered each of the circles with a second application of spot putty and allowed that to cure for another 30 minutes before sanding.

After the wet-sanding, the thing started to feel just like a brand-new over-sized bowling ball, it was that smooth and blemish-free.  I was very impressed with myself!  I wiped it down with mineral spirits, as indicated on my tin of oil-based polyurethane varnish.

I took a sponge brush and applied the first coat of varnish to the dome and the board base.  Now I just have to wait 4-6 hours for that to dry, and then more 220-grit sanding and a second coat!  I'll get to that in the morning before work, I think.

Getting closer to the big fiberglassing day!

Sunday, March 9, 2014

Day 64 - Little bit of dome, little bit of gun

I've been fighting some procrastination lately, mainly because two video games I've been looking forward to were released, and I've been playing them instead of working on Rainier.  But, today, I changed that!

I spent a great deal of time today sanding down the dome plug to clearly expose the streaks and pits I will need to fill before varnishing it with polyurethane.  I attacked it aggressively with 80 grit sandpaper, then 120 grit, then switched to a 220 grit pad on my orbital sander.

Although I made sure to take a very light approach with the orbital sander—since I didn't want to compromise the symmetrical curve of the sphere—I wound up making the chamfered edge a little less defined.  I'll need to go back over those parts by hand and see if I can get some sharpness back on that.

Afterward, I took a 300 grit sanding sponge and went over it all again, giving it a nice polish.  Once I fill in the pockmarks and streaks, I'll sand those down and do a final wet sanding with 1000 grit paper.

After my arms started to feel like they were about to fall off from all the sanding, I switched things up and started to work on getting holes cut into one of the steel gazing globes for the gun.

I began by masking off the part that I wanted the hole, placed the gun's tube against it, and traced around it with a pen to make a circle.  Then I drilled a series of small holes on the inside of the circle.

I then used my Dremel tool to cut the resulting small bits of metal between the holes, and finally sand/ground the jagged edges with the Dremel using (probably incorrectly) a sanding drum mandrel.  It pretty much destroyed the sanding band, but did a remarkable job making a smooth hole in the globe.

I test fitted the tube, ground down the edges a little more, test fit the tube again, etc.  Eventually, the tube slipped right in.  Now I had to figure out there to cut the exit hole.

I turned the ball over, covered the other end with masking tape, and drilled a hole where I guessed the center of the tube would be if it were properly sticking out the other end.  To check to see how close to the correct location I was, I used a marker to make a center point on the end of a 1" wooden dowel (that I will be using for guide pegs later on for stack assembly).  I inserted the dowel into the globe and seated it against the globe's inner surface to see where the center mark lined up to the drill hole.  It was pretty close.

I used that mark on the dowel as a center point while I again traced around the gun tube.  I had to do trace the circle a couple of times to get it just right.  I then repeated the drilling and Dremeling process.  I slid the globe onto the tube, and now the gun is basically complete.

I'm going to grind down the hole nearest the gun base a little more, as there's a bit of an off-center gap where the base isn't touching the globe on one side.  It's barely noticeable, however.  I'll then use a hose clamp to secure the globe into place.  After that, I will just have to powder coat the globe black, but I'll do that when I get to the plunger arm in a while.

The latest stack shot is starting to look more and more menacing ...