Tuesday, September 13, 2016

Day 141 (who's counting at this point?) - Adding fender height, suspension, and underlighting!


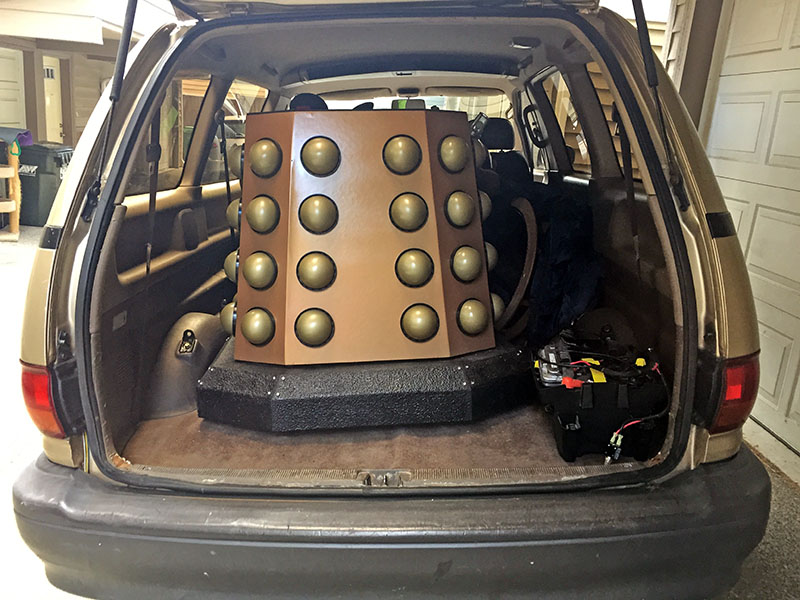
After over a year, Rainier finally got an update!  After 13 months of trundling and scaring small children to the questionable delight of their parents, I got a little tired of my low ground clearance getting in the way of my Dalek's mobility.  While thinking of methods to raise it, I also wanted to try and absorb some of the ricketiness that I experience when I travel over any kind of bumpy surface.

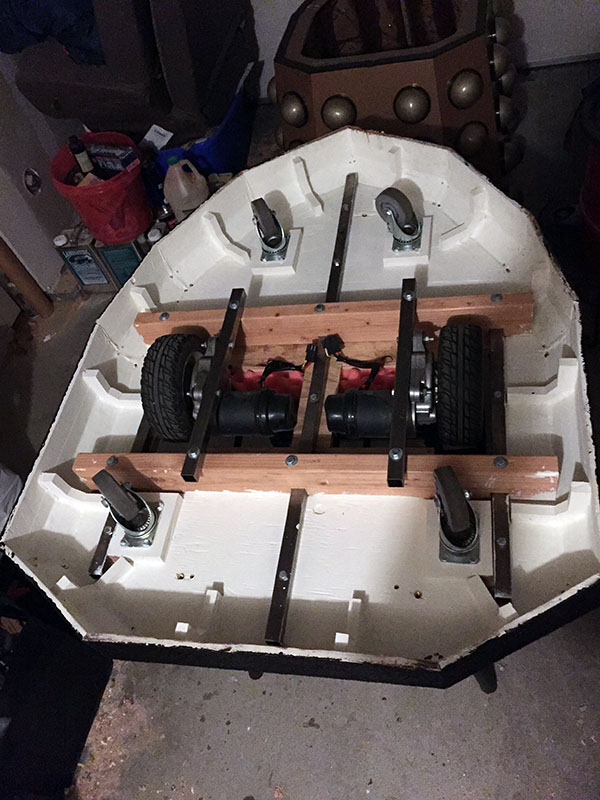
So I dismantled his pieces and (with the help of a friend) put his fender upside-down on the operating table.  I wanted to examine the points at which I would need to add some height.  The four casters were a given, and the mounting points for the motorized wheels would need to be lifted, as well.

I had thought of several ideas for adding height and suspension, including string steel compression springs, but eventually I settled on the same black rubber spacers that my DIY wall-mounted TV rests on.  They are an inch in height, and about the same in width, and slightly conical in shape.  There are 20 mounting points that I needed to elevate (hehe, "EL-E-VATE!"), so I bought 20 spacers at Lowe's in their hard-to-find parts section.  I drilled a hole in the center through each one using a 5/16" drill bit.

Each of the four casters is mounted by four shortish 5/16" hex bolts (2.5" long, I think), so I bought 16 bolts that were an additional inch longer.  I unbolted the caster and its mounting block, and, using a box cutter, I cut through the white paint that semi-adhered the block to the fender.  I pushed the spacers onto the new bolts, and attached it all back to the fender, spacers now sandwiched in between the two wooden sections.  I repeated this process for the other three casters.

One thing I noticed was that, now that there's rubber, there's nothing that resist against the hex nuts.  You can tighten and tighten the nut, so you need to eyeball it to make sure they're all tightened the same so that one caster is level with the rest.  I will need to add a second nut and perhaps a locking washer to make sure they don't come loose with vibration.

Now for the hard part, and it's a bit hard to describe.  There were four mounting points for the electric wheels that needed to be raised.  Simple, right?  I removed the four long 6" hex bolts and immediately saw my problem.  Jazzy Select wheelchair wheels are attached to their motors by a steel mounting assembly with three bolt holes.  Two of these I use to attach them to steel square tubing, securing them to my fender.  The third pokes through the top of the fender, and I have a long piece of thick threaded rod mounted to it to keep the wheels in a straight 90° angle to the ground (otherwise they would buckle under Rainier's weight).  I couldn't simply add an additional inch to all this because the wooden fender top and a central piece of steel square tube were in the way.

I decided to simple cut through it.  I took out a metal-cutting wheel for my Dremel, and began slicing away at the center square tube.  It was ugly—there wasn't much room in there for cutting, so it was all at wonky cutting angles.  Eventually I got through.  Then I flipped the fender over, and took my jigsaw to cut away the necessary fender wood.  Now I could add spacers to raise the wheels.  Once again, I flipped the fender back over to add the final four spacers underneath.

For some reason, there is no 5/16" hex bolts that are 7" in length.  Lowe's had 6" and 8", so I got four 7" carriage bolts instead.  There's a squarish shape on the underside of each bolt head that raised the underside of the head slightly off the steel square tubing, so I added a couple of washers so that the bolt had something to sit on directly.  Then I tightened all that down.

I was very concerned about hacking through the central steel support, so I bought a 3-foot long, 3/16" thick by 1" wide flat steel panel and cut a couple pieces to length with my miter saw.  I marked some points where I wanted to attach it to either side of the compromised support (fender top and fender bottom), clamped them together and drilled 5/16" holes through both.  This was where I could bolt it all together.  I then clamped one on, drilled the remaining holes through the center support rod and the wood of the fender, then bolted it all together.

While Rainier's fender was up on the table, the idea struck me to add the LED strip lighting to the sides of the fender.  I dug out where I had stored the LED strip reel, and traced a path around the inside of the fender, temporarily clamping the strip into place.  I wound up using window screen mounting clips to secure it, each one facing the opposite direction to keep the strip stationary.

When I was finally all done with that, I took the fender off the table and re-assembled Rainier form the fender on up.  The wheels were not at all even with each other, and the whole fender rocked back and forth like a bad restaurant table.  However, a simple tightening of the nuts on the new bolts fixed that.  Like I said earlier, I will need to find some way of making that adjustment stay in place, like locking washers and an extra nut.

I was very pleased with the additional 1" of ground clearance, and I wanted to turn the underlighting.  I don't yet have a battery for it, so I used the wall outlet to take a look at its effect.  I was a little bit blown away.


So anyway, that's my update, after a year's Daleking around.  Back on the front page again!  (At least for a little while!)

Wednesday, August 26, 2015

Worldcon73 (Sasquan 2015)

NOTE: There are two Davids in this entry.  I refer to one as "David W." and the other fully as "David Gerrold".

Worldcon - Day 0 (Friday)

On Friday, I left work a couple of hours early to go home, pack up some clothes, and pack Rainier into the van.  Except that there was no van on the street.  It was missing, and the only thing near where it was parked was a wooden sign saying "Tow Away Zone, no parking 50' near this sign".

So I called the number on the sign and tried to see where the van had got towed to.  After being told to call a separate line, I confirmed its location, hired a car service to get there, slammed down $249 to get it out of impoundment, and then spent the better part of an hour getting the van back home.  With now only an hour to spend getting ready and packing Rainier, my clothes, and my dog, I set to work double-time.  David W., one of Rainier's minions, helped me get Rainier inside, and off we went to pick up Rainier's other minion, Cavin, downtown.

Then, by about 6:00pm, we were all three of us (and one dog) finally on the road to Spokane.  Spokane is a 279-mile trip from Seattle, and there's a direct route (I-90) that gets there.  The trip was fairly uneventful, but I learned that the van has some fits and starts climbing extended hills or in-between 60-70 miles-per-hour.  I learned a bit on how to handle it, though, so we were okay.  Because of all the wildfires happening in Washington and other states, any time we took a washroom break, the air smelled of one gigantic campfire.  It was hazy driving for the majority of the trip.

We eventually got into Spokane at about 10:30pm, and GPS directed us to the hotel where we had made reservations.  We parked, examined potential spots for assembling Rainier, and made out way to the concierge desk.  David W. sat in a lounge chair to rest, and Cavin took the dog outside to take care of that end of things.  I got our room keys, and asked to confirm if I needed to put down a pet deposit.

"Oh, we don't allow pets on the property at any time."

Okay, that's not what I was told when I made the room reservation, but then I was told that it was a different hotel in the chain that accepted animals.  I booked at the Davenport Grant, when what I wanted was the Davenport Tower.  So, she kindly made the call over to the other hotel, confirmed that they (miraculously) had a room free during Worldcon, and that they were waiting to serve.  She cancelled my original reservation with no penalty fee, and off we went, about a half-mile away to the other location.

We parked, checked in, and crashed for the night, smelling of campfire smoke.

Worldcon - Day 1 (Saturday)

The following day, we set out to find just where we were supposed to go.  But before I continue the story of this weekend, this is now the part where I get to spill the beans on why I had to finish Rainier by Anglicon at the earliest.

A friend of mine, David Gerrold, is a writer, and we've known each other for over two years now.  If you don't recognize the same, you'll be forgiven, but he's left a few bits of legacy behind in his long writing career.  For example, he invented the Tribbles for the original Star Trek series, and wrote the accompanying episode, "The Trouble with Tribbles".  He'd been following my progress on Rainier a few months after I started him.

Well, he was invited to be a guest-of-honor at this year's Worldcon (the 73rd annual), and to be Master of Ceremonies at the 2015 Hugo Awards presentation.  Accepting the honor, he immediately started to formulate how he wanted the ceremony to go.  He decided he wanted a Dalek.  He decided it should be my Dalek.

He called me up with a rough outline of the show, and what Rainier's part in it would be.  Rainier was to present two awards: Hugo Award for Best Dramatic Presentation - Short Form and Long Form.  I set forth to finish Rainier's construction by Anglicon, and functionality by Worldcon.  You've read about all that in previous entries.

Anyway, back to the weekend.  We arrived at the loading dock of the theater where the Hugos are to be held, and unloaded and assembled Rainier outside.  Then we rolled him up the ramp into the loading room, and then into the backstage area.  While we were there, we bumped into Urban Jungleboy—builder of the TDK Tiki-Style Dalek—busily assembling what would eventually become a very tall grim reaper ... commissioned by our mutual friend, David Gerrold!  He was in a bit of a hurry, but we chatted for a bit, and became chums.

I tested out Rainier's electronic bits.  They are still a bit of a shambles: some cables are too long and need trimmed and re-soldered; some pieces—like the MartMod and the various smaller batteries—need to be mounted somewhere and fastened down; I need a proper chair and not the folding aluminum one I've been using, etc.  But, my minions buttoned me up inside Rainier, and we rehearsed.

When David Gerrold saw Rainier in person, he screamed in delight.  Like a really high-pitched, elated yelp.  He complimented the work, and said that it was honestly some of the best craftsmanship he had ever seen.  And this is a guy that's worked in Hollywood.  I was blown away and humbled by the compliment.  I'm still kinda processing that, to be honest.  Sophie Aldred, Colin Baker, and Jon Davey said similar things, and I don't really let myself believe it.  Rainier's my first ever prop; how can it be that great?

Back to the rehearsal.  There was no script; David Gerrold and I lobbed ideas back and forth and settled on a loose framework for how I was to enter, introduce myself, present the awards, and exit.  (I didn't interact with Tananarive Due—the other Master of Ceremonies, but she had her own stuff to do; she was impersonating Uhura fabulously.)  The theater people hooked a transmitter to the headphone jack of the MartMod (my 4-ohm speaker proved to be too weak), and soon, Rainier's modulated voice filled the whole bloody house.  It was amazing.  They also worked with the grim reaper which was to start the show, and it was amazing.

After that, we checked out the con a bit, wandered the expo floor, swung by the Anglicon 2016 booth, read a lot of stuff about the late Sir Terry Pratchett and his involvement with Worldcon over the years, and had lunch.  We went back to the hotel, took care of the dog, and then napped a bit to build up our energy for that evening's award ceremony.

Getting back into the theater (and into the Dalek), we waited for the show to start.  And waited.  By the time the show started, I was inside Rainier for about 45 minutes.  I didn't know how much more time it would be before my two Hugo categories came up.  After another hour, they did, and I rolled out to center stage, to the absolute shock and wild applause of a full house who hadn't a clue that a Dalek was going to be there.  I, of course, didn't notice—I instead saw that I'd forgotten to turn the transponder on for the sound.  I did so, resumed a menacing stance, and started to yell "EXTERMINATE" at the audience.

David Gerrold (per our agreed-upon banter) rushed over and said "No, no!  These are the Hugo nominees!  We don't want to exterminate them!"

"WE DON'T? WHAT ABOUT ONES WHO DON'T WIN?"

"Well, I guess we can get more nominees next year. No! We don't want to exterminate them, either!"

"WHAT ABOUT JOHN SCALZI?"

And so on.  I went off the rails at that point, and kept David Gerrold in stitches.  Hopefully there will be someone who surfaces a video of the thing.  It's all a blur, and it was amazing.

(The Hugo winners for my categories were, by the way, Orphan Black for short form and Guardians of the Galaxy for long form.)

Afterward, we all breathed a collective sigh of relief.  The ceremony was done (which was already built up to be a controversial one: google "sad puppies" and you'll read all about it), the winners deserving, and the tension released.  David Gerrold, Tananarive, and I posed for a bit of backstage photos, and then it was time to take Rainier back to the van.

While rolling him back into the loading dock area, who but George R. R. Martin walked into view!  He waved at Rainier as he walked by, but I just had to beg for him to return and pose with Rainier for just a few moments.  He graciously obliged, said something about how he and the Dalek were alike in that they loved exterminating people, and on he went.

(Little did I know that I was going to hang out at his Hugo Losers afterparty that he's been annually hosting since 1976, but that's another story for another time.)

I got back to the hotel at about 2:00 in the morning, and promptly died in my sleep.

Worldcon - Day 2 (Sunday)

On Sunday, we slept in a little bit, grabbed our belongings, and checked out of the hotel.  I was to volunteer a couple of hours at the Anglicon 2016 booth back at the expo hall.  Cavin and David W. dropped me off, helped me assemble Rainier once more, and then went out to eat lunch and go shopping.  I ran into Kevin (Urban Jungleboy) again, who was trying to figure out a way to get the fully-assembled Grim inside.  I stopped for a picture that's very reminiscent of C-3PO and R2-D2, then wheeled Rainier inside and into an elevator.

Lots of people wanted his picture, and I obliged for awhile, but eventually I said that I needed to get to the Anglicon table and that he'd be there for two hours.  That was a nice lure.  Fresh from his notorious performance at the Hugos, people came up to the Anglicon booth to talk about him and our Seattle convention.  I mentioned to them that he made his official debut at Anglicon, and that they'd get to see him again at the 2016 convention.  I got a few people to sign up on the mailing list, at least.

When the time came to leave the expo hall, Worldcon, and Spokane behind, I wheeled Rainier over to David Gerrold's book booth to wish him farewell and on a job well done.  He was unfortunately presenting at a panel, so I snapped a shot of Rainier there, at least, to give him later.  I also bought two of his books.

I went outside with Rainier to wait for Cavin and David W. to pick us up, and while doing so, a young Japanese girl shyly stepped over and asked if she could get her picture with the Dalek.  It was really very sweet; she seemed to be in heaven.  Her parents explained that Doctor Who is her favorite show.  I'm assuming that they flew all the way from Japan to attend Worldcon.  She was just so delighted I thought she might pop.

Then, Cavin and David W. arrived, we packed up Rainier, and off we went, back to Seattle and home.


Monday, August 17, 2015

Getting Rainier ready for his next convention

It's gotten to the point in my diary where titling the build entries by the number of days worked doesn't make much sense (at least sometimes), so this entry will be about his post-Anglicon/next con update.  I'll mainly cover the stuff I did to get Rainier ready for me to pilot him from the inside, but before any fancy remote-control stuff.

For Anglicon, Rainier's eyestalk light was a small flashlight mirror that was screwed onto the threaded lamp rod exposed inside the back of the eyepiece (as seen in a previous build entry).  My Neo-pixel LED ring was simply taped to it, and that was powered by a tiny 3.7v 150mAh li-poly battery.  For what it was, it worked, but I wanted something a little closer to how I have the end result pictured in my head.

This is still a bit of a messy hack—I'm still using wax paper to cover my lens to diffuse the light, and I'm still taping this inside the eyepiece front to secure it.  Then, sandwiched together, I've got a bigger parabolic flashlight mirror, a second acrylic disk on which the neo-pixel LED ring is taped, and then a spacer (simply a discarded chocolate truffle container lid, trimmed up a bit) to fill up the remaining space inside the eye, leaving little to no wiggle room.  In the future, I want to replace that spacer with a motorized remote-controlled iris, similar to Nzarra's build.

All of that is then connected to the wire leading to my 5-volt smartphone emergency battery (which gives me about eight hours of light), and now has a lovely, noticeably brighter, light.

Switching topics, I went ahead and let my Toyota dealership install the struts and shocks on my van because I really didn't have time to learn how to do all that myself.  Of course, we paid a premium for that, but now we have a much more road-worthy van.  Her name is Miss Cleo Van Gogh (which we pronounce "van go" here in the states—she's a van, and she goes).  To test her out, we packed Rainier's various components inside, seeing if we could get away with just taking the back-most seats out.  It worked great, so now we can pack Rainier, two passengers, and one driver.

I also wanted to get a test trundle in before his next con (to be reported on soon), as I didn't want to undertake my Daleking duties there under-rehearsed.  We drove around to try and find a park with some fairly flat areas.  Rainier's fender is so close to the ground that uneven terrain would likely get him stuck.  We eventually settled on Cal Anderson Park where there's a stretch of wide, level sidewalk.  As we were assembling Rainier, a family gathered close and were asking all sorts of questions, hardly believing their luck at witnessing such a strange sight at the park!  It was quite flattering.  They couldn't believe he was made entirely from scratch.

(Some shots and a quick video of Rainier interacting with the crowd are at the end of the entry.)

The following day (today), I took some of my lessons learned from the trundle and applied them, namely in the speaker department.

Nothing is really secured inside Rainier at the moment.  I basically have a box in my lap where I keep the jumpstarter battery, the MartMod voice modulator, and the piles of untrimmed wire—all of which will need a better, cleaner solution which I haven't got to yet.  When trundling, I have to hold the speaker in place with one hand, and steer the joystick with the other.  Only when I come to a full stop can I move the dome, which has invariably wandered around a bit on the lazy susan.  My arms were getting pretty tired doing this after awhile.  It stayed surprisingly mild inside, temperature-wise, but that was probably because I had fresh air from outside blowing in.

I decided to at least secure the speaker.  I had been trying to think of an elegant way of doing this, which involved taking apart my little 4-ohm speakers I picked up from Re-PC (two of which I got for $4.00 total), but I couldn't figure out how they were put together.  So, I decided to potentially sacrifice one by drilling exploratory mounting holes and attaching them to metal brackets that I had.  Once I put the screws in, I hooked it up to the MartMod for a quick voice test, and it passed; I had damaged nothing.

Now that that's taken care of, I can control the dome with one hand and the joystick with the other, which will make for a much more believable interaction with the crowd.

Next update will very likely be after this coming weekend, so see you soon!


Tuesday, June 23, 2015

Days 125 through 130 - Getting Rainier ready for Anglicon 2015

After getting back home to Seattle from our holiday in England, Wales, and France (and re-adjusting to our local time zone!), I was left with about two weeks to get Rainier ready.  In the mad rush, the days sort of ran together.  I'm estimating I put in about a week's worth of time, so I've bumped up the counter to 130 full days working on him since July of 2013.

First and foremost was addressing the eyestalk tragedy.  I mixed up some more ABS glue (ABS plastic melted in acetone), cut a new interior tube piece to attach to the cone front part of the eye.  I sanded flat both the new edge of the tube and the damaged edge of the cone piece and glued them together.  This I let sit until it was cured, and then sanded back as much of the clear sealer, black topcoat, and primer as I could, along with the glue seam.  Then I re-primed and re-painted the pieces.  Not perfect, but it'll do.

While on the subject of the eye, I decided it was high time to put in his light.  I got a cheap flashlight and magnifying glass from a great Japanese dollar store called Daiso in Seattle's International District.  I removed the parabolic mirror and the lens (also pictured is an iris from a microscope that Nzarra used in his build that I've yet to install).

Without easy access to a laser cutter, I decided to cut out some acrylic disks using my scroll saw from an acrylic sheet that I had laying around.  I cut four of these (one each for the mirror, iris, lens, and potential small servo down the line).  I sanded the edges smooth until they fit comfortably into the smaller of the two eye sections.  So far, the only one I've used was to house the lens.  I cut a hole in the center of one of the disks, and then sealed the lens using the same caulking that I used to secure my dome light ping-ping balls.

For the eye light, I used a Neopixel ring driven by a Trinket microcontroller that I got from an Adafruit kaleidoscope goggles kit.  These can be powered via USB or battery, but for the sake of Anglicon, I just used the included 3.7v LiPo battery.  Later on, I bought a 12v car jumpstart battery that has a USB port, so I'll likely use that next time.  I did a bit of surface-mounting soldering to attach the JST battery connector.

I've done programming before, so I'm pretty familiar with the syntax of both Java and C++, so I downloaded the Arduino IDE onto my computer, connected the board via USB, and started tweaking a sample block of code to get the LEDs to light up.  Although I intend to use another acrylic disk to attach the Neopixel ring and mirror to, I just simple taped the two together, and uploaded the program to the board.  And there was light!

(Later on, I spent some time programming an automated light sequence that utilized the LEDs brightness settings to simulate a random iris-like movement.  It was subtle, but noticeable; the eye would dim or brighten a random amount, at random intervals.  With the 3.7v battery, this effect lasted about 2.5 to 3 hours before depleting.)

Switching gears yet again, one other important physical aspect of Rainier that I hadn't done was attaching the neck to the shoulders.  I once again took a page from AdamSt's brilliant diary (though, not exactly the same way, as he's more skilled with wood chisels than I am), and placed four keyhole hangers on the surface of the shoulder top.  Once these were screwed in, I temporarily removed them to drill out some extra space under the holes for the eventual screws.

In the exact corresponding locations on the underside of the neck (and offset by about 1/4" for the locking "twist" action), I screwed in button head wood screws, being careful not to buy ones that exceeded the thickness of the neck rings (3/4"), and that would fit into the holes of the keyhole hangers.  Placing the neck on the shoulders, I lined up the screw heads to the keyholes, then twisted the neck into place with a firm jerk.  It worked really well!  The neck stays in place nicely, and can be attached from the inside as well.  There's a gap in between the neck and shoulders, but I can either tighten the screws a bit more into the neck ring, or I can add weatherstripping for cushioning and filling.

That was all I got done before Anglicon.  His debut was a huge success, and he was used for several of the group photo sessions with Colin Baker, Sophie Aldred, Katy Manning, and Jon Davey.  It was more than I ever could have expected, and Sophie stated something to the effect of "These Daleks look so much better than what we worked with on the show!"  Jon Davey hung around Rainier a lot and asked several questions, even having me open Rainier up so that he could take a peek inside.  He was also amused that we saw the very same Doctor Who Symphonic Spectacular in Cardiff, where he played a Dalek on stage.  Great times.

After Anglicon, I finally cut out access holes in the rotation plates (to make life so much easier).  I didn't use any template, just chose the pattern that I've seen in countless build diaries.  I am not giving Rainier 360° rotation, so the lower plate has a wedge where movement can physically stop (if I use a manual rod control before adding remote control and servos later).  The top plate has three potential locations for installing a servo and additional battery, if needed.  Then I sprayed the bottom of the lower plate black, as well as the inside edges of the eyestalk pivot jig.

And now for the final bit.  I was determined to give Rainier his voice.  I had tested the voice modulator much earlier in this build, but I hadn't connected it to the newly-installed dome lights.  Taking Rainier's dome and neck to my friend Jeff's house, we worked in his shop connecting everything together and testing it against his heavy-duty gigantic 12v jumpstarter battery instead of the AC adapter we used before.  Once it was all connected and tested, I took it home, hooked it up to my own jumpstarter battery and gave Rainier a little test.  Enjoy!


Thursday, May 7, 2015

Day 124 - The stack shot of stack shots

Remember this?  This was my first stack shot, featuring the first part to be completed—the skirt—along with the two objects that set the bar for me on this build: actual Heronrib matting, and actual Moflash lens covers.  If I was going to build a Dalek, by damned I was going to make an accurate one.

Well, before I get to all of that, I'll talk a bit about some final touch-up stuff I worked on.  I had a can of black spray liner that ChristmasDalek gave me quite awhile back, and I used this to dab onto the bare grooves that I cut into the fender.  I sprayed a glob onto some paper, and used a sponge brush to tap the liner onto the groove.  It worked pretty good!

Once that was dried, I focused on attaching the socket head cap screws I bought specially for the fender panels.  I searched and failed to find an official measurement for these bolts, so I just looked at photos and eyeballed it.  Basically I just measured 1cm in from the groove line and the top, and 1cm from the groove and 1.5cm from the bottom.  Then I pre-drilled a hole slightly smaller than the screw, and twisted the screw in.

My first foray into gunbox felt lining wasn't too successful, so I tried a different method this time.  I bought little adhesive felt pads and attached eight of them to the interior of the gunbox and the retention plate.  I was going to use contact cement for those, but their own adhesive backing with seemed to work fine; plus, they will be compressed together when they surround the gazing globes.

I also applied weatherstripping to the fender and the skirt.  Even though I cleaned the surfaces, it lifted up in places.  The compression of Rainier's separate components against each other should be enough pressure, but I can always go back and try reinforcing the bond with contact cement.

Oh, speaking of contact cement, I did have to use some for one of my plungers.  Somehow, the rubber split in the stem, right at the point where the bolt head is imbedded.  Apparently, that's a weak spot, and the rubber is rigid enough to "break".  I re-attached it by coating both ends with contact cement, letting them dry for about 15 minutes, and then sticking them together.  The bond seems sound.

And I finally got to attach the gunbox details!  These were beautifully cut aluminum pieces traded from gregg.nowling, far better than the laser-cut baltic birch ones that I originally intended to use.  The latter split slightly when I was trying to widen the bolt holes.  To attach the metal ones to the gunboxes, I did the same thing as I did for the fender details; pre-drilling holes and then attaching the screws.

Then, I re-attached the plunger and gun arms, screwed on the shoulder slats, and covered the screws with chrome plastic caps.  I attached all the bumps and oil seals.  I re-attached the rotation plates and lazy suzan to the now-painted neck section, screwed in the pivot mounts and pivot onto the top plate, put the dome on, attached the eyestalk ...

... and with that, Rainier was externally complete.  And I wasn't prepared for that.  All of a sudden, I had a complete Dalek standing before me!

But before I get to that glorious stack shot, here are some up-close photos:


I only really have minor quibbles:
  • the neck blocks wound up being a bit fuzzy from PVA-sealing, and I didn't do a great job sanding them back
  • the slat edges are a lot more noticeable than I thought they would be, should have cut rabbets (rebates) into a wider faceplate
  • there's a gap between the skirt and the fender (the weatherstripping hides this a bit), but the skirt bottom is ever-so-slightly warped like a rocking chair
  • some missed pockmarks in the dome cowl front
  • the dome is sitting a little too high (likely due to fiberglass reinforcement on the inner plate mounts)

But overall, damn.  He looks good:


Next up: mostly just invisible stuff.  Weatherstripping and attaching the shoulders to the neck; building a bench (although a standard aluminum folding chair fits nicely inside); cut access holes into the dome rotation plates; somehow getting the dome to sit a little lower, maybe by sanding back the resin on the inner dome inserts.

Oh, and also all the lighting and electronics.