 This will hopefully be an informative yet amusing post. So, where did we leave off? Oh yes, I had made a plunger master mold out of ABS plastic and PVC pipe. Let's show the kiddies what I did with it!
 I was very inspired by chrisosborne's post about making a two-part silicone mold for the plunger, but I didn't want to build a mold box out of acrylic sheets. I looked around on the web for alternatives, and after perusing a few YouTube videos on the subject, I decided to build one out of Lego bricks.
Keeping this mold exactly centered was very important to me, as I wanted the final rubber plunger to have a uniform wall thickness (the thinnest part of the plunger only being 1/8" thick). The main advantage of having a Lego mold box, according to my thinking, was that all the Lego studs would keep everything very much in center. I used a forstner bit to drill a hole in one of my sacrificial Lego bricks (*gasp!*) to center the PVC portion of the plunger.

For the bottom of the mold box, I made an extra reservoir space with a grilled floor. This would force the cured bottom mold to be perfectly in place and not move around, again ensuring the centering of the final piece.
 To keep the plunger master mold in place, and to prevent silicone from seeping into the inner cup, I filled the plunger bowl with plasticine putty. When I placed the master mold back into the mold box and centered it, it stayed put.
(Not pictured is the event known as the "cup overfloweth", where I lost about $75 worth of leaked silicone when I tried to mold the bottom part first without making sure things were sealed. Lego like to come apart when weight is placed on them. Who knew?)
 Next up was to mix up a batch of the silicone (I used something called a Squirrel mixer, which caused me no end of amusement, ah, the visuals) and whipped up a bunch of blue goop in no time. It has a nice 30-minute pour time, too. I placed the mold box on the floor, and from about three feet up, I poured the silicone in a very thin bead to reduce air bubbles. After a few long minutes, I was done and the mold was filled. Now I just had to let it set for 24 hours.
 A day later, I checked on the mold and the silicone was nice and firm. I took the bottom part off and cleaned out all the putty, wiping off any remaining smudges of it with paper towels and a microfiber cloth. I placed the bottom of the mold box back on, prepare more liquid silicone, and fill in the bottom part of the mold. And then wait another 24 hours.
 When the other half of the mold was ready, I removed the whole lego enclosure and looked at my handiwork. I had two wonderful halves of the plunger mold, complete with alignment keys and perfectly centered. The man at TAP Plastics told me that nothing sticks to silicone like more silicone, so I used some release wax and an oil-based agent (called Pam cooking spray) on the mold interior. I was thrilled to mix up a batch of black rubber and get to work!
 I modified the Lego box a bit by only using a few rows of bricks around where the two mold pieces meet, to prevent leakage. In the center of each side, I built pillars all the way to the top of the mold to lay a jig, which would be used to suspend and center a bolt within the plunger stem. This would then screw in the plunger to its arm bushing. I destroyed another sacrificial lego by drilling a centered 1/4" hole for the bolt. I then mixed up some of the two-part rubber and added the black pigment to it (note that it says "shore A-30" on the bottles, this will be important). This mixed very thinly, so I needed to slap a bit of the plasticine clay onto the Lego to prevent leakage.
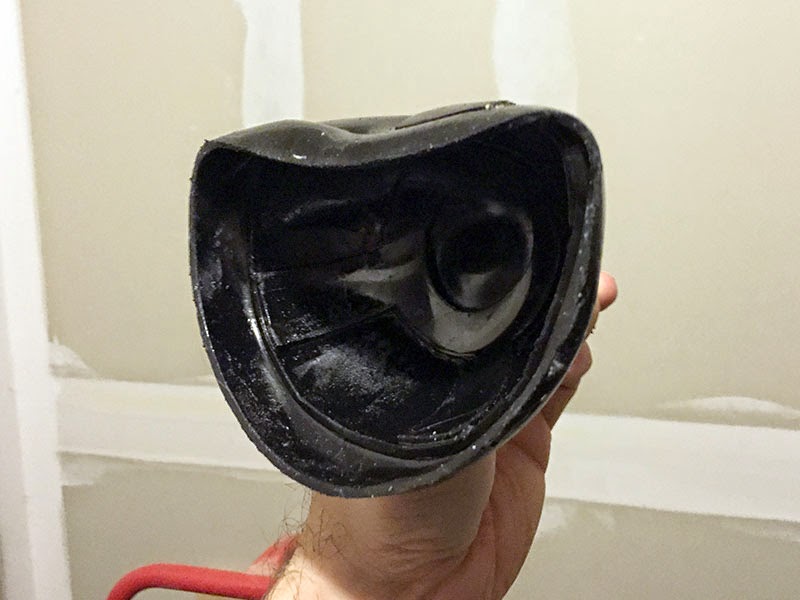
 After about 18 hours or so, it was time to demold the plunger. I was very excited! The bottom mold popped off easily enough, and before too long I managed to get the top part off, too! And then I held my plunger to the light, and it ... started ... to ... droop. And there were weird and bumps on its surface. The drooping, I later found, was due to the shore number (remember A-30?). A-30 is softer than a pencil eraser (which is A-40). A-70 is about the strength of a car tire. A-85 is a wheel on an inline skate. TAP Plastics doesn't carry anything beyond A-30, since they're selling mold-making materials.
 So, again, I referred to chrisosborne's post, and saw that he ordered A-70 rubber, which I promptly went online and ordered, too, from the very same store! It hasn't come in yet, but when it does, you'll be the first to know how it goes! (Well, after me, obviously.)
As far as the pits and blemishes, I can only assume that the TAP Plastics guy was wrong about the vegetable oil. I think it reacted to the liquid rubber and made things kinda weird, chemically. The plunger is still a bit tacky (bits of rubber fall off when a finger rubs it) even after several days, now. ChristmasDalek expressed a potential interest in it, but I'm not sure its ability to survive in our harsh world.
No comments:
Post a Comment